
A timeless nail art idea that’s easy to execute
Written by: 100% PURE ®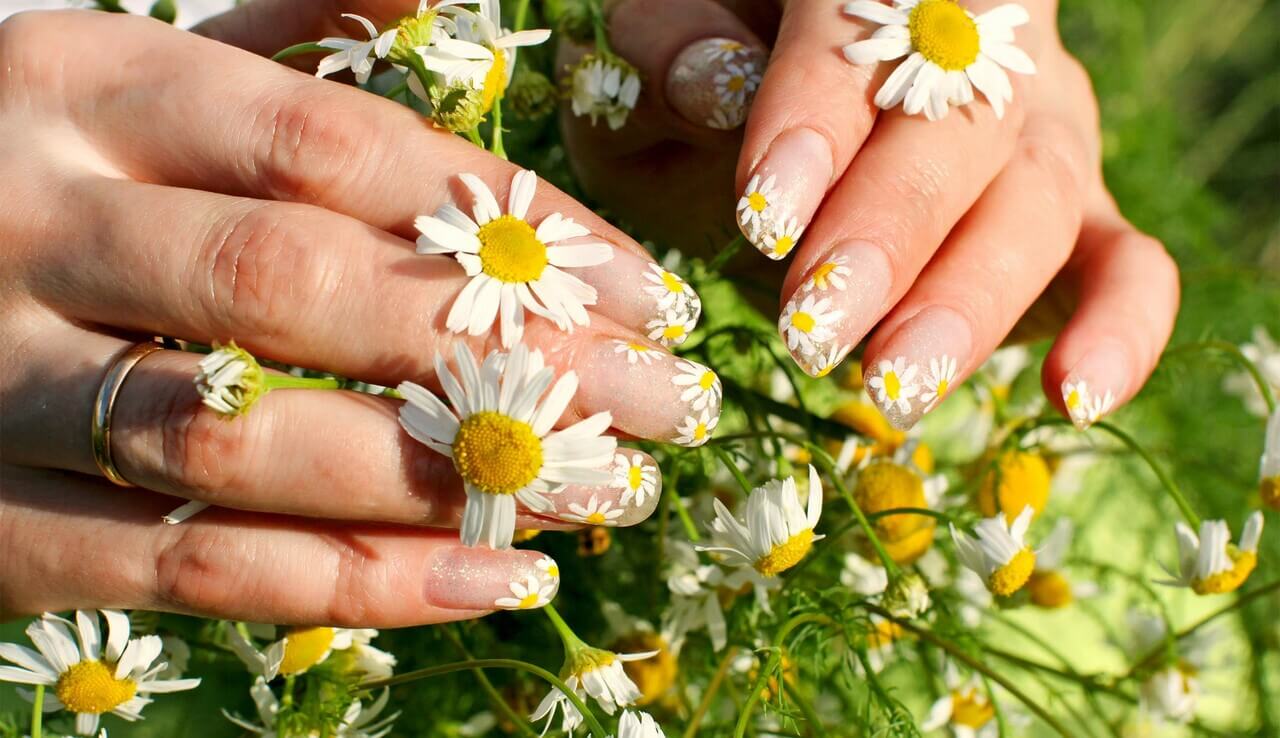
Is there anything cuter than floral nail art in spring? How about floral nail art ideas for the winter holidays! While we tend to reserve the holidays for holly and poinsettia, we decided to break a few rules this year with something a little different. That’s why we’re obsessed with this festive daisy design!
Inspired by 1960s mod style, these daisies are more than cute. They’re completely novice-friendly and fun to create. Plus, their overall simplicity gives way to endless possibilities for your nails.
But just as much as we want our daisy nail designs to look fun and cute, it’s also important to us that we use safe, non-toxic ingredients for all our nail art ideas. That’s why we always recommend natural nail polish. You can read more about that in this article, where we talk about 5-free, 10-free, and even our own 20-free nail polish formulas.
With that in mind, let’s get into this natural nail polish look!
Let’s talk about the nail colors you’ll need for your nail daisies. One of the best parts about daisy nail art ideas is that you can use whatever color scheme your heart desires. You can create blue petals with an orange bud, a modern-looking black and white design, or you can even make each petal a different color.
But if you’re looking for a basic, classic daisy look, we recommend using a white nail polish (like our Zer0 brand nail polish in Oat Milk. You can also try a true pink (Bubble Gum), or a powder blue (Cruising Altitude) for the nails. Don’t forget your top coat! Our Glass Top Coat delivers glossy, chip-resistant shine that will protect your nail art.

That being said, achieving nail art ideas like these takes a little more than a few nail colors. You’re also going to need a few simple tools. You’re going to want to grab either a toothpick, bobby pin, or rounded metal dotter. You’ll also want some aluminum foil to use as a palette for your natural nail polish for these kinds of nail art ideas.
If you’re a beginner with nail design, it may help to start out your nail art on just one accent nail and paint the rest of the nails with one of your base colors. Alternatively, you can stick with just one or two daisies per nail during your first attempt.
Newsletter Subscribe
for more blog updates and exclusive discounts
Now, let’s get into the technique behind these daisy nail art ideas!
First off, we recommend starting with a base coat. Not only will this help the manicure last longer, but it can also protect your nails from pigment staining.
Onto the artistic portion; daisy art is great because it’s easy, and straightforward to execute. The simplest way to go is by starting with the petals.
First, take the color you want for your petals, and pour a tiny amount of it onto your foil mixing palette. Then, take your metal dotting tool and lightly dip it into the polish. On your nail, create six dots in a tight circle. It’s completely okay if the petals overlap here and there and they can totally be a little uneven. Just make sure that they’re somewhat distinct and have a shape.
Once you have six dots, wipe excess nail polish off your dotter, and dip it into the color you want for the center of your flower. Then, gently press one single circle in the middle of the petals you just created.
As you continue to add daisies to your nails, don’t be afraid to play around with the colors you’ve chosen. Perhaps one flower has white petals and a pink center, while another has blue petals and a white center, or vice versa. No matter what direction you choose, you can’t go wrong!
And don’t just play with color, have fun with the sizes of the flowers, too! When your nails are decorated with different-sized flowers, you’ll notice a greater sense of dimension for a more vibrant look that’s pleasing to the eye.
Keep forming daisies on your nails until you’re either happy with your look, or you simply run out of space. Whichever comes first, allow your nails to completely dry before adding on a top coat. If you follow these directions, you should end up with some cute, cheerful little flowers on your nails this holiday season.
PRO TIP: If you want to try some really festive nail art ideas for the holidays, we recommend a holiday-inspired color scheme, with shades like red, silver, and white. For a naturally fun look, check out our nail polish in the shades Red Over Heels, Silver Screen, and the Oat Milk shade you used above. Happy painting!
- Tags: make up, Makeup, November-2021
We carefully hand-select products based on strict purity standards, and only recommend products we feel meet this criteria. 100% PURE™ may earn a small commission for products purchased through affiliate links.
The information in this article is for educational use, and not intended to substitute professional medical advice, diagnosis, or treatment and should not be used as such.


