Contour Your Face Like a Pro - Even If You’re a Beginner
Posted on April 9, 2025 Written by: 100% PURE®
Raise your hand if you’ve ever ran to the bathroom mirror amped after seeing a contour tutorial only to end up with a contour that took a detour? Novices or contour connoisseurs alike, most of us have had a misguided contour blunder or two.
While the notion of contouring might seem time consuming, it doesn’t have to be with the right direction. We’re shining a highlight on how to contour your face in 5 easy steps - plus how to highlight - and the best contour products you can use to achieve a more sculpted complexion.
What Is Contouring?
You know that sculpted or ‘snatched’ look you often see on beauty influencers or on a certain celebrity sisterhood? That’s contour. Essentially, when you contour you’re slimming your face and enhancing your cheekbones or other facial features. What’s behind this magic sorcery!?
Contouring is using shading or shadows to create an illusion of recession. Since contouring can help define or reshape your facial features, the areas that are not darkened or shaded then stand out! This can make your cheekbones look more pronounced, or your nose narrower – the eyes the limit!

What Contour Products Should I Use?
Though we’re not currently at the height and hype of the contouring movement, we're still excited about the idea of a sculpted look. Whether you’re a newbie or pro contourer, we can guide you to a more sculpted Adonis self - albeit a more natural one than that of years past.
Your contouring 101 starts with the right products. We’re talking about ditching the heavy foundation and concealers for natural, lightweight, wearable contour makeup. But that doesn’t mean you can’t add a little definition and pizzazz with a few easy strokes and products!
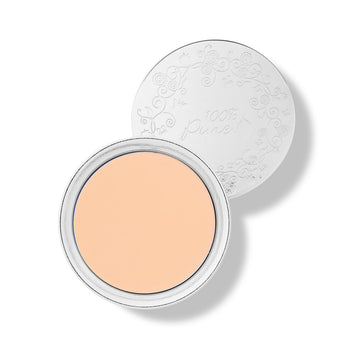
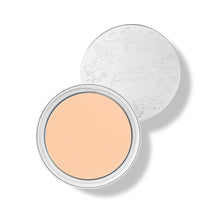
#1. Cream Contour
Here’s the fun part – you don’t need a fancy contour wand to create a magical chiseled complexion. You can use a cream contour to create shadows or enhance - or play down facial features. Choosing a cooler tone from our Fruit Pigmented® Cream Foundation collection can create contrast, sharpen, angels, and slim the face. Plus, it’s colored from fruit, vegetable, and seed pigments for feel-good skin and antioxidant defense!
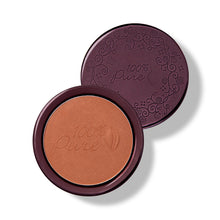
#2. Powder Contour
The goal of contouring is to give yourself realistic-looking depth and dimension. It will be harder to create contours or shadows if you’re using products that are difficult to blend, especially for beginners. To enhance the angles of your face, use a powder contour for faster blending.
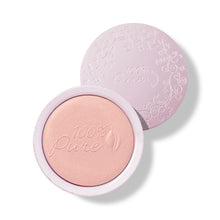
A perfect matte base to build upon your contours is our Cocoa Pigmented Bronzer, which is infused with vitamin-rich fruits and natural cocoa pigment. All you’ll need is a minute to apply this for contours and you’ll be on your way to a natural looking chisel. Plus, it’s easy to rub away if you’re just learning to contour.
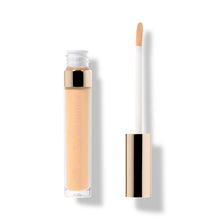
#3. Liquid Contour
The last thing we want is cakey makeup or a super defined contoured look. If you’re looking for a contour that feels natural or like a ‘second’ skin, go for a natural concealer for contour makeup because of its effortlessly blendable and buildable coverage.
That “second skin” is our 2nd Skin Concealer that reigns supreme in any natural contour makeup routine. We tapped into healthy fruits and veggies to help color our natural concealers with an added infusion of skin-softening olive squalene to help you contour with the lightest, softest satin finish.
How to Choose the Best Contour for Your Face Shape
You’ve got the tools, you’ve got the product—but if your contour isn’t flattering, something’s still missing. That “something” is understanding your face shape. When you know how to contour your face based on its natural structure, you stop fighting against it and start enhancing what’s already beautiful. This guide will help you apply contouring makeup in a way that complements your unique bone structure, so your look feels customized and effortlessly sculpted.
Pro Tip: Understanding your face shape helps you achieve the most flattering contour makeup look—because contour isn’t one-size-fits-all.
Round Face – Create Definition & Elongate
Your goal: Add structure and length.
Where to contour: Apply contour makeup along the sides of your forehead, under your cheekbones, and just under your jawline. Keep your highlighter focused on the center of your forehead, nose, and chin to draw the eye vertically and create the illusion of length.
Bonus: Avoid circular blending motions—go for more angular, upward strokes to subtly sharpen the face.
Oval Face – Enhance Natural Balance
Your goal: Maintain symmetry while adding soft definition.
Where to contour: Lightly contour under the cheekbones and along the temples. You don’t need much—oval faces are already naturally balanced, so think of contour as a way to softly define, not reshape.
Bonus: Use a light hand with product. In this case, less really is more.
Square Face – Soften the Angles
Your goal: Soften strong jawlines and forehead edges while keeping that gorgeous definition.
Where to contour: Focus on the sides of the forehead and along the jawline to round out the edges. Blend under the cheekbones, angling slightly downward rather than straight across, to add dimension without sharpening.
Bonus: A warm-toned contour can add a bit of softness if your features feel too angular with cool tones.
Heart-Shaped Face – Balance the Top & Bottom
Your goal: Highlight cheekbones while minimizing a wider forehead or pointy chin.
Where to contour: Shade the sides of the forehead and temples to bring them in slightly. Add contour just under the cheekbones, blending upward. Keep product minimal on the jawline, but if needed, apply a small amount under the chin to create balance.
Bonus: Don’t forget your highlighter—it draws attention to your best feature: those cheekbones.
Diamond Face – Highlight Symmetry with Precision
Your goal: Soften wide cheekbones and draw attention to the eyes and jawline.
Where to contour: Lightly contour the widest points of your cheeks, and blend along the forehead and jawline to even out width. Focus highlighter on the forehead center, chin, and under-eye area to bring balance and glow.
Bonus: A slightly shimmery highlight on the brow bone helps draw attention upward and enhances symmetry.
Whether you’re still learning how to contour or leveling up your skills, choosing the best contour technique for your face shape makes all the difference. With a little strategic shading and a solid understanding of your facial structure, your contouring makeup routine can go from “meh” to model-off-duty in minutes.

How to Contour Your Face in 5 Easy Steps
So, now that we’ve got the right contour products in our beauty arsenal, it’s time for the next step in contouring 101: how to correctly contour your face. Contouring is much more approachable without detours and when its application time gets cut in half.
That’s why we’re paving the way to contour your face with a few easy steps that anyone – even beginners - can do with a few makeup tools or products!
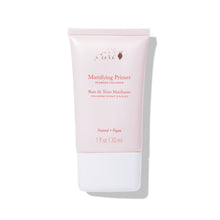
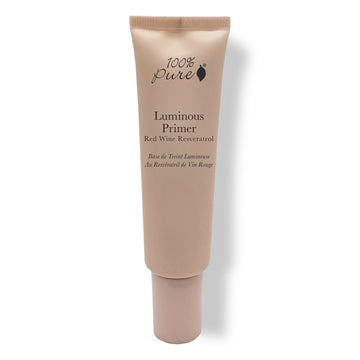
STEP 1: Select Primer and Foundation
Select your usual foundation shade and apply as you normally would. Don’t forget to set yourself up for success by starting with a Mattifying Primer or Luminous Primer.
PRO TIP: Use a kabuki brush or makeup blender to buff and blend this lightweight foundation into skin, starting at the center of the face and working outwards.
STEP 2: Shade Key Areas
As described above, choose a cream, powder, or liquid contour 1-2 shades DARKER of your normal foundation shade or a few shades darker than your skin tone. Apply your contour choice with a bigger/wider brush to your cheekbones and jawline rather than using a skinny brush tip. A larger shape fits perfectly into the angles and hollows of your cheeks and lower jaw, and yet is soft enough to blend out contour for a natural look.
PRO TIP: Use an angled contour brush to apply the contour or bronzer in a controlled technique in smaller areas such as the sides of your nose or hair line.
STEP 3: Blend It Out
Start with a lighter application at first. You can always add more to build the intensity. It’s much harder to take away than to add on! Make sure to blend, blend, blend so there are no hard, visible lines.
STEP 4: Highlight
Contouring is great for enhancing and sculpting the structure of the face, but it’s not the only trick up our makeup sleeve. If you’re looking for quick definition, highlighting will do just the trick.
Find the areas on your face you want to accentuate – the tops of your cheekbones, brow bones, cupid's bow, bridge of your nose, and chin – to create the illusion of dimension and definition. Our Gemmed Luminizers are perfect for glorious shimmer and sparkle from real gemstones, while being ultra-nourishing for your skin.
PRO TIP: Use a skinny brush tip and a highlighter if you’re wanting to contour your nose to make it appear slimmer, or add a pop of shimmer onto your eyelids or inner creases of your eyes.
Common Contouring Mistakes & How to Fix Them
Even the best contour makeup techniques can go sideways with a few simple missteps. If you’ve ever looked in the mirror and wondered why your sculpted cheekbones aren’t giving what they’re supposed to give, don’t worry—you’re not alone. Mastering how to contour your face takes more than just knowing where to swipe product. Let’s fix the most common contouring makeup mistakes so you can walk out the door looking lifted, defined, and effortless.
1. Using the Wrong Shade
The Problem: If your contour shade is too warm, too dark, or too light, it can look muddy—or worse, orange. Many confuse bronzer vs contour, but they’re not the same. Bronzer adds warmth. Contour creates shadows.
The Fix:
Choose a contour shade that’s one to two shades deeper than your natural skin tone with a cool or neutral undertone. That mimics the look of natural shadows, which is the whole point of contouring. If you're unsure, test shades along your jawline in natural light. The right contour should recede—not stand out.
2. Harsh, Unblended Lines
The Problem: Harsh lines can make even the most expensive contouring makeup look obvious or theatrical (unless that’s the vibe you’re going for—we see you, drag queens and stage performers).
The Fix:
Blend like your paycheck depends on it. Use a damp beauty sponge or a soft, angled brush to diffuse the edges. Make small, circular motions instead of back-and-forth swipes. The goal? Shadows that whisper, not scream.
3. Overdoing the Product
The Problem: More product doesn’t mean more definition—it just means more blending. Over-contouring can age the face or create an unnatural look.
The Fix:
Start with a light hand and build only where needed. A little goes a long way, especially with cream formulas. Remember: you can always add more, but you can’t un-blend.
4. Skipping Highlighter
The Problem: Contour without highlight is like a story with no climax—flat and unfinished. Highlighter complements contour by bringing light to high points of the face, balancing out the shadows.
The Fix:
After contouring, apply a subtle highlighter to the tops of your cheekbones, the bridge of your nose, and your cupid’s bow. It gives you that lifted, lit-from-within glow that makes your contour pop without looking heavy.
5. Using the Wrong Tools for Application
The Problem: Your tools can make or break your look. Using a dense foundation brush for powder contour, or a fluffy brush for creams, can leave streaks or make blending harder.
The Fix:
Use an angled brush for powder contour, and a dense stippling brush or damp sponge for creams. These tools are designed to help you place and blend product exactly where you need it—making your life (and your cheekbones) easier.
You don’t need to be a makeup artist to contour like a pro. Avoiding these common mistakes will help you build a contouring routine that’s quick, flattering, and totally foolproof. Whether you're still learning how to contour or just refining your technique, remember this: the best contour enhances what’s already there—you.
Conclusion
Whether contouring is all the top beauty hype or signaling you out on your For You page, the face slimming-feature highlighting trend is here to stay. Hopefully with these surefire steps on how to contour and the right products to enhance your best features, you’ll feel less intimidated about the notion of contouring – and more excited to try the famed chisel look for yourself.
FAQs
How do I contour my face step by step?
Great contouring starts with great prep. Here's a simple step-by-step guide to help you get started:
- Prep your skin: Cleanse, moisturize, and apply a primer for smooth application.
- Apply foundation: Even out your skin tone with a foundation that matches your complexion.
- Map your face: Use a contour product (cream or powder) one to two shades darker than your skin tone. Apply it to the hollows of your cheeks, sides of the forehead, jawline, and sides of the nose.
- Blend, blend, blend: Use a damp sponge or a contour brush to blend the product into the skin until it looks like a natural shadow.
- Highlight: Apply a lighter shade or highlighter to the tops of your cheekbones, center of the forehead, bridge of the nose, and chin.
- Set your makeup: Use a translucent or pressed powder to lock everything in place.
Learning how to contour your face is all about practice. Don’t be afraid to experiment!
What is the difference between bronzer and contour?
Bronzer vs contour comes down to function and finish.
- Bronzer is used to add warmth and mimic a sun-kissed glow. It usually has a bit of shimmer and is applied to the high points of the face where the sun naturally hits—like the cheeks, nose, and forehead.
- Contour is used to create shadows and define features. It’s typically matte and cooler in tone, applied under cheekbones, along the jawline, and the sides of the nose to sculpt the face.
They serve different purposes but work beautifully together when applied strategically!
How do I contour my nose to make it look slimmer?
Contouring your nose is all about subtle shading and clean lines:
- Use a small, angled brush to apply a contour shade along the sides of the bridge of your nose.
- Connect the lines at the tip to shorten and lift the nose if desired.
- Blend carefully with a fluffy eyeshadow brush or a damp sponge.
- Highlight the bridge of your nose (keeping the line thin and centered) to draw the eye inward.
Go light with the product—nose contouring is easy to overdo. A little can make a big impact!
What’s the best contour makeup for beginners?
If you’re new to contouring makeup, look for products that are:
- Cream-based or stick formulas (easier to blend and correct)
- Buildable rather than super pigmented
- Cool-toned or neutral shades that mimic natural shadows
Some beginner-friendly contour products include:
- Cream contour sticks (like Fenty Beauty or NYX Wonder Stick)
- Drugstore powder contour palettes with multiple shades to experiment with
- Dual-ended contour/highlight tools for convenience
The best contour is one that works with your skin tone, blends easily, and gives you confidence.
How do I make my contour last all day?
To lock in your look, follow these tips:
- Start with primer to grip the product.
- Layer cream and powder products for extra staying power—cream contour first, then set it with powder contour.
- Use setting powder over your entire face to reduce oil and shine.
- Finish with setting spray to hold everything in place through heat, sweat, and long days.
These steps help make your contour makeup look fresh all day long—no touch-ups required.
- Tags: April-2025, make up, Makeup
We carefully hand-select products based on strict purity standards, and only recommend products we feel meet this criteria. 100% PURE™ may earn a small commission for products purchased through affiliate links.
The information in this article is for educational use, and not intended to substitute professional medical advice, diagnosis, or treatment and should not be used as such.