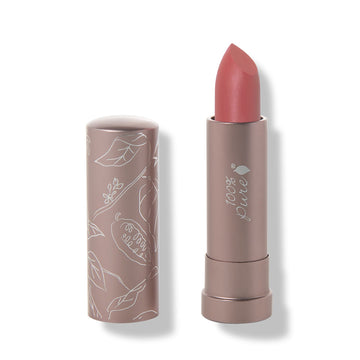
Unpacking everything from lip liner to lip gradients to get the most flawless, luscious lipstick application
Written by: 100% PURE®
So you thought that applying lipstick was a one and done deal? Newsflash: we’re living in the age of variety, and mixing up something as basic as your lipstick application is far from outlandish. Whether you prefer your lip color straight from the tube or applied with painstaking precision, there are a few basic methods and principles for getting a flawless finish.
In this post, we’ll detail our top five ways to apply lipstick, and provide you with steps and photos to help expand your lipstick universe. Our methods for applying lipstick are executed with high performance lip colors made from real fruit pigments, fruit oils, and plant butters. You won’t find iron oxides, parabens, plastics, or crushed beetles in any of the natural lipsticks below! That’s right: no animals were harmed in the making of these lipsticks. Can your lipstick say the same?
Before you apply your makeup, what do you do? You guessed it: priming skin is essential in getting a flawless makeup application and long-lasting finish. The same can certainly be said with lips and lipstick, but the priming process is a bit simpler.
Start with clean, dry lips before you start applying your favorite lip color. Scoop a pea to dime sized amount of paraben and petroleum-free lip scrub onto your fingertips; the amount will be dependent on the size and roughness of your lips. The large (more surface area) your lips are or the more flakey (more buffing required), the more scrub you’ll need to scoop.
Next, apply your scrub directly to your lips, or to a clean toothbrush. Immediately begin buffing your scrub in tight, gentle, circular motions against your lips. Repeat this motion for about 15 seconds, then allow the moisturizing elements of the scrub to absorb into your lips for about a minute before rinsing with warm water.
Your lip scrub will likely leave your lips feeling supple and smooth, but finishing with a super light layer of natural lip balm will help to seal in moisture for extra-dry lips. And there you have it – a primed, moisturized canvas for the lipstick shade of your choice.
Browse these curated mini-tutorials to amp up, polish, or perfect your lip makeup application game!

Caution: the following makeup tip is for pros only! We’re totally joking – lip brushes are easy enough for any makeup amateur to use, but deliver a fool-proof professional finish. Our Retractable Lip Brush L10 is just such a brush, outfitted with a precision paintbrush tip that’s perfect for both cleaning up edges and applying otherwise unruly colors.

Using a lip brush is an absolute must for bolder formula choices, like matte lipsticks or liquid lipsticks. These formulas can get somewhat rowdy on the lips – more prone to smudging, budging, and feathering. Applying your color with a lip brush will help to place color carefully and with intent, rather than loosely while hoping for the best.
To use your lip brush, remove the cap and push it onto the bottom end of your brush. This will activate the paintbrush tip, which is your secret weapon. The rest is simple: swipe your brush against the lipstick bullet or wand of your choice, then quite literally ‘paint’ the color onto lips. It truly is *that* simple to get a clean, professional finish in your lipstick look.
PRO TIP: Into brushes? Try buffing the color you’ve applied just outside the outline of your lips with a smudger brush. Keep strokes small and controlled will create a blurred, bee-stung effect that makes lips look plumper, poutier, and more natural.

These gradient lips are deceptively easy and deliver a delicate, angelic effect. The key here is to keep the color at the center of your lips, and to use a high pigment, easily blendable formula.

The first step in this lipstick method starts with your foundation routine. Using a beauty blender or brush, gently diffuse the outline of your lips by overlapping your face makeup coverage with your lip coverage. This means ‘coloring outside the lines’ with your foundation makeup, just enough to cover the majority of your lips. If you’re going foundation-free, use a lightweight concealer to diffuse the outer edges of your lips.

After your lips have been lightly camouflaged with foundation or concealer, go in with your lip color of choice (we used Rum Nougat Lip Caramel). Part your lips and dab on the color, only concentrating pigment near the center of each lip (using a lip brush will make this easier). Next, gently bite lips together or use fingers to blend the color, diffusing it to a blurred concentration at the center of your lips.

The finished effect of gradient lips is a soft, kissable pout, which makes the mouth look more delicate and petite. For added drama, use a deep mauve color instead of a nude lipstick shade. To pump up the playfulness, layer over a sheer lip gloss to assist with blending and infuse lip-plumping shine.

The name of the game here is simple and swift. “The Purist” lipstick method is for those in a hurry and on the go, or who are simply using a more forgiving lipstick formula. This means tints, balms, semi-sheer, and sheer shades like those in the Lip Glaze collection. Balm and sheer to semi-sheer formulas can be effortlessly applied straight from the tube for a full wash of color, with either a dabbing or swiping motion from your lipstick bullet. Yep, it’s called “The Purist” for a reason: no frills, no extras – just the facts, ma’am!

“The Naturalist” isn’t a method for applying lipstick while hiking, or while bird-watching in the woods – it’s for a natural, soft finish from your otherwise full-pigment lipstick shades. Ever found a red lipstick shade with just the right undertone balance of blue and berry, but didn’t want the full punch of pigment? That’s where your makeup sponge comes in!

Start with clean, dry, and primed/ moisturized lips. Instead of following the #3 method of applying straight from tube to lips, arm yourself with a lipstick bullet in one hand and a teardrop-shaped makeup sponge in the other. Apply the lipstick to the pointed end of your sponge, then dab the sponge tip to your lips. Some of the pigment will be grabbed by the makeup sponge, while a percentage will be transferred to your lips for a natural, more sheer wash of decadent color.
PRO TIP: A full coverage, satin lipstick formula like our Pomegranate Lipstick is perfect for creating a supple, subtle finish that’s both natural looking and luxuriously lip-softening.

We’ve saved the most complex and understandably daunting method for last: applying lipstick with a lip liner. This dynamic duo is the stuff of legends, but more recently has beauty amateurs spooked because of its seemingly rigorous rules. Let’s unpack those real quick!

First, choose a lip liner with your actual lipstick shade in hand. Matching your lip liner to your lip shade is half the battle, and one that misguided makeup shoppers often lose. Start by identifying the undertone of your lipstick, and match THAT to your lip liner. The biggest mistake that people make is trying to match colors – like pink liner to pink lipstick, red liner to red lipstick. In reality, the subtleties of clashing undertones are the true cause of mismatched lip liner efforts.
Next, start with application on clean, dry lips. If you like a more natural look, start with lip liner before lipstick – for a sharper edge to your lips, apply lip liner last. Start the outline with your cupid’s bow for definition; you’ll want the lip liner to glide just below the peak of your lip’s edge.
Before you move to the bottom lip, strike a few short marks onto your lips. On the top lip, extend them down and out from the valley of your cupid’s bow. On the bottom lip, strike 3 vertical marks at the center of your lip. These marks will increase traction and density for your lip color, to help it last longer and stronger throughout the day. Complete the outline by tracing the curve of your bottom lip for an enhanced appearance of fullness.

Finish your look by applying your select lip colors directly over lips, careful to stay inside the lines. If you’re nervous about going past your marked barriers, stop short and then blend by biting and rolling lips together to blend.
Follow our blog for more tips, tricks, and fun facts on natural lip colors!
We carefully hand-select products based on strict purity standards, and only recommend products we feel meet this criteria. 100% PURE™ may earn a small commission for products purchased through affiliate links.
The information in this article is for educational use, and not intended to substitute professional medical advice, diagnosis, or treatment and should not be used as such.